Building the EDC ONE Bag
While I have made a lot of costumes and clothing, I’ve never previously sewn a bag. When I saw the YouTube video of Adam Savage building his EDC TWO bag, it made me want to build a bag, too.
In the video he mentioned that the EDC TWO is slightly smaller than the EDC ONE and I wanted to make the full-sized bag. He sells the plans for both, but I bought the EDC ONE pattern. I see that since the time I bought it he’s now offering it in your choice of physical/paper plans or a PDF download. I’m glad I bought the paper plans; it’s huge and I don’t have a printer that would accommodate such a thing. Taping a million sheets of paper together isn’t my style.
Big thanks to Adam Savage and Mafia Bags for making this pattern and publishing it.
The pattern is licensed by Adam Savage under a Creative Commons Attribution-NonCommercial-ShareAlike 4.0 International License. I think that means you could technically distribute the pattern for free as long as you give credit, but it’s all of $15 and I feel good contributing to someone who put something cool together. I don’t think my explanation here really needs a license, but assuming it does, let’s also use that same license with the same restrictions, etc.
OK, let’s get this going.
Assumptions
I will make some assumptions as I go along here about a few things. You may have to Google some stuff if you don’t know what I’m talking about. Here’s what I assume:
- You have the EDC ONE pattern. I’m not going to give you the pattern here. I’m going to show you how I used it and call things out about it.
- You have some sewing experience. If I mention that I basted two pieces together, you should know it doesn’t have anything to do with a turkey baster. Tons of YouTube videos and articles out there to catch you up if you don’t recognize what I’m talking about.
Improvements and Errata
Along the way I’ll point out the improvements that could be made in the pattern as well as some of the “bugs” I encountered in the pattern or provided instructions. If you’re building along here, it’d be good to read through all of this first so you might know what’s coming.
General Tips
- Watch your sewing machine tension. I had a heck of a time getting this right and some of my stitching from the inside looks bad. If you normally sew through a couple of layers of medium weight fabric, using heavier-weight fabric means you’re going to have to adjust. For example, my machine usually sits on a tension level 4, but for something close to decent I had to almost double that to 7.75.
- Use the right needle for the job. I used duck canvas for the body of my bag. I had some leather and denim needles but they really didn’t work out in thicker areas. When putting the handle attachments on the bag, for example, you may be sewing through upwards of six thicknesses of fabric. Six layers of duck canvas bends a leather needle. I didn’t find until the end that there are “heavy duty needles” (size 110/18) that are made for this sort of job and I wish I had known earlier.
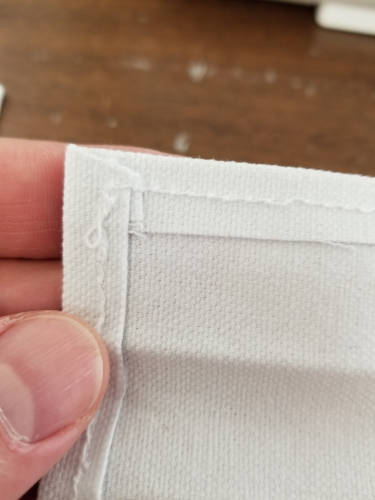
- Clip corners to reduce bulk. Especially if you’re using thick fabric, you need to clip some of the corners to make sure things lay flat. This includes some of the things like the handle attachments that get sewn to the bag body - without clipping, you see fabric folds and weirdness along the edges.
- Baste things in place. I had a bad time holding super thick fabric with pins. It was pretty good to machine baste things in place close to the edge of the fabric / inside the seam allowance to keep the parts together while assembling. This was especially helpful when attaching the lining, zipper, bag outside, and metal frame holder pieces in one go.
- Watch your seam allowances. This pattern doesn’t work like a Simplicity or Vogue pattern you might buy at the store. That was sort of hard for me.Common patterns use a 5/8” seam allowance. The instructions on this pattern say it’s a 1/2” seam allowance unless marked. However, they may only change the seam allowance on one side of a pattern piece, so if you see a 3/8” marking it might only mean for that side. When in doubt, measure.
- There’s no pattern layout for the fabric. You have to kind of figure out how to place the pattern pieces yourself to make the best use of your fabric.
- Use the drawings and reference photos. Given the instructions are a little vague in places, use all the photos and drawings you can to fill in the gaps. I wouldn’t have been able to finish this without the detailed photos for their finished bag.
- There are bugs in the pattern. I will call them out shortly, but you’re not crazy.
Initial References
- EDC ONE bag - This is what the bag looks like fully put together. Really helpful for reference photos to see if you’re building things right.
- EDC ONE pattern - This is the pattern I bought.
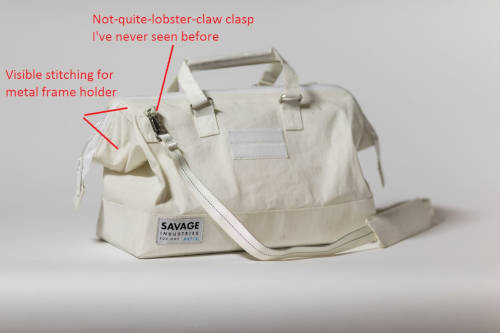
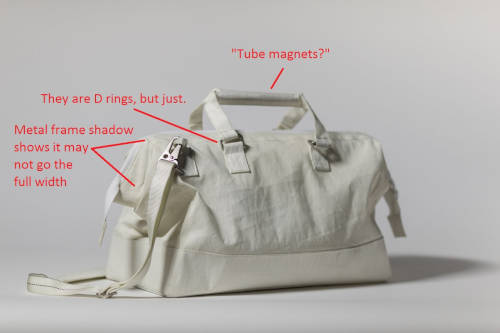
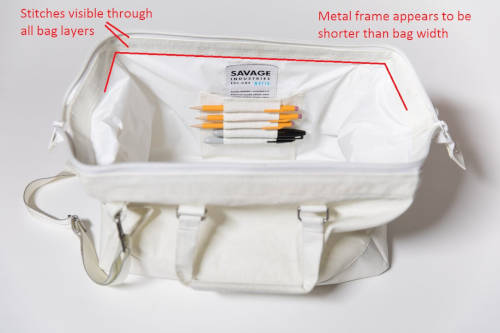
When looking at the pictures of the finished bag and comparing to the pattern, I took some notes.
Front:
- The pattern calls for lobster claws to hold the shoulder strap. The lobster claw they use isn’t like anything I’ve seen. I searched and couldn’t find anything like that.
- You can see the stitching that attaches the metal frame holder channel inside the bag. The pattern doesn’t specifically say you need to sew through all thicknesses when attaching that, so its good to know that’s what’s happening.
Back:
- The pattern calls for “tube magnets” to put in the handles. I’ll get into this later, but I couldn’t figure out what this was and the picture didn’t make it any more clear.
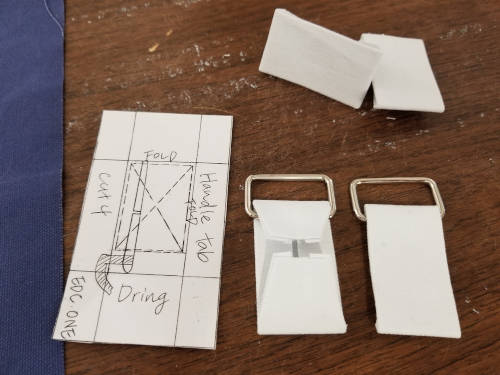
- The “D rings” used to hold the handles on look more square here than standard D rings. I ended up using rectangle rings instead of D rings.
- The shadow on the bag shows that the metal frame you insert in each side of the bag opening may not go the full width of the side - there’s space between where the two frame halves end to allow the bag opening to bend freely.
Inside:
- Again, you can see the frame holder is stitched to the bag through all thicknesses. There’s no crafty seam hiding here.
- Also, again, you can see the metal frame appears slightly shorter than the width of the bag to allow the bag to open and close easily.
Pattern Bugs
Here are the things I found that are wrong on the pattern. Keep these things in mind as you are cutting and sewing.
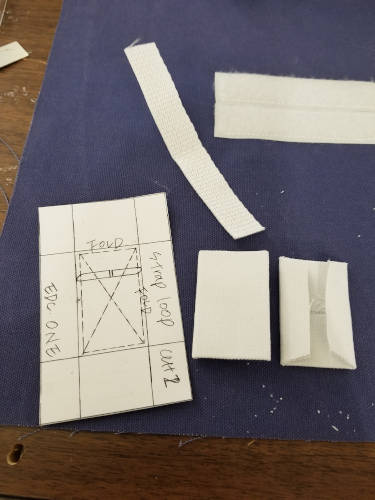
- The “strap loop” piece is marked “cut one.” Howeer, you need two of these - one for each side of the bag. Cut two.
- The pattern calls for 5” of 3/4” webbing used with the strap loops. Again, this is only enough for one and you need two loops… so you need 10” of 3/4” webbing. (I’ll update that in my parts list below.)
- The bottom piece says you need one for the lining, one for the bottom, implying a total of two pieces. However, you need one for the bottom of the “A panels,” one for the bottom of the “B panels,” and one for the lining - a total of three pieces.
- The instructions say to use 3” Velcro pieces on the main panel for your patch but the pattern drawing measures out at 3.5” for the Velcro pieces. I don’t know which is right, but given the 70” Velcro measurement I think it’s supposed to be 3.5”.
- The handle tab pattern piece is slightly larger than the placeholder shown on Main Panel A. I think the drawing on Main Panel A is wrong.
- There are no instructions explaining what to do with the shoulder pad pieces. For that matter, there’s no “pad” in the shoulder pad in this pattern. I’ll explain what I did in my instructions.
- There are no instructions explaining when you should attach the D rings or the strap loops to the main bag.
- There is no measurement for the metal frame. I used two 22” pieces of 3/16” steel rod. I bent 3-5/8” legs on each end of the rod pieces for the U-shape of the frame.
Parts List
The parts list that ships with the pattern is amazingly vague. For example, they list “self fabric.” Uh… how much? “Lining.” Again, how much?
Here’s a more detailed parts list based on what I actually used. Note I used a different fabric color for the bottom than I did for the main bag body so I list those things separately. Also, I didn’t really pay attention to fabric grainlines since I used duck canvas and it generally looks and works the same regardless of direction. You may need to factor that in.
- 18” of 60” duck for body
- 12” of 60” duck for bottom / accent
- 18” of 60” rip stop nylon for lining
- 29” continuous zipper with two sliders meeting in the middle
- 4 - D rings (rectangle rings) 1” inside width
- 2 - lobster clasps: 1” inside width for strap, clasp big enough for 3/4” webbing
- 1 - webbing slide, 1” inside width
- 70” of 1” wide Velcro
- The pattern calls for 2 “tube magnets” for handles. I used…
- 60” of 1” wide webbing
- 7-3/4” x 15” plastic board for the bottom (corrugated sign)
- 44” of 3/16” steel rod for the metal frame
- 10” of 3/4” webbing
- 3” x 12” craft foam for the shoulder pad if you decide to follow my enhanced instructions
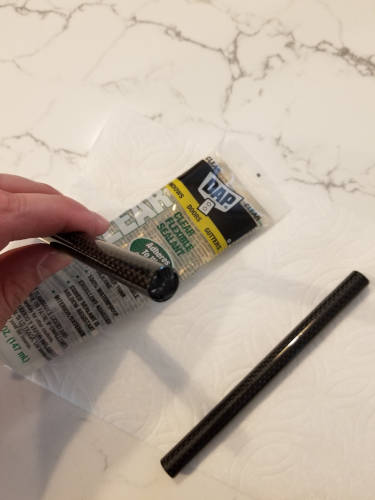
I have no idea what a “tube magnet” is, but that’s used in the handle of the bag. I figured I wanted something that would be nice and strong but still have the magnetism, so I put neodymium magnets inside carbon fiber tubes. To keep the magnets centered in the tubes I put some padding in each end and sealed them up with some silicone sealant.
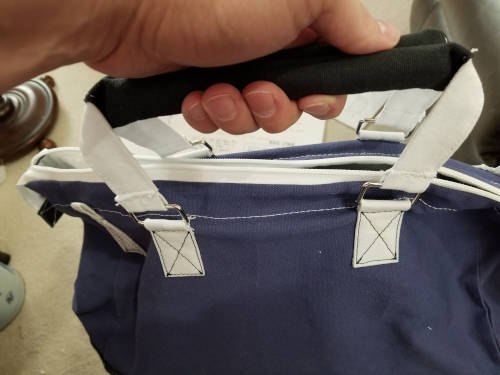
In the parts list I show using two magnets (one for each handle) and 8” of tube (4” for each handle). You may see in my pictures that I actually went with four magnets (two in each handle) and 12” of tube (6” per handle). This was too much. My handles are a bit too long and the magnet power is a bit stronger than my liking. I may later redo the handles with shorter tubes.
A note on neodymium magnets: They are powerful and they will jump out of your hands to attach to each other. If they do this, they may hit each other with enough force to break. This absolutely happened to me. Luckily I could just jam them into the carbon fiber tubes and it wasn’t a big deal, but be aware this could happen.
Preparation
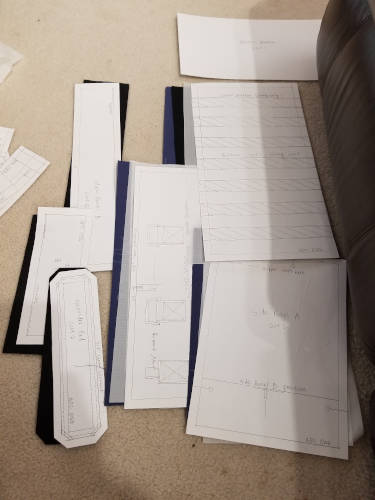
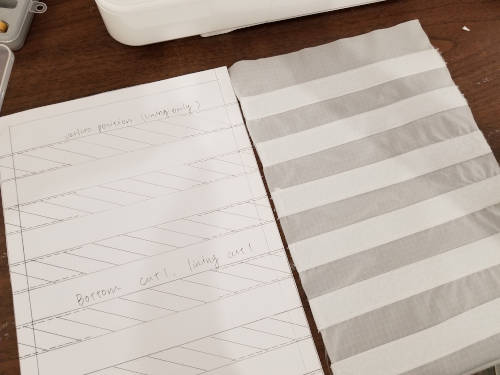
Cut out all the parts. I didn’t bother transferring pattern markings onto every part because this pattern is very square - you can just measure where things need to be at the time you need to place them.
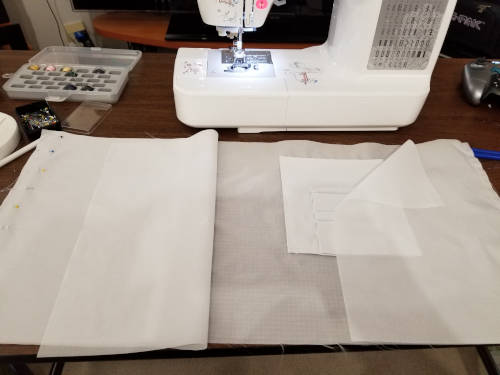
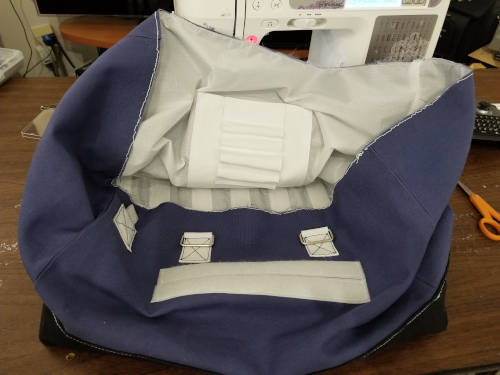
Attach seven strips of Velcro, each 9” long, to the bottom of the bag lining.
Enhancement: Either don’t use Velcro at all, or ensure you use only the soft half of the Velcro. I’m not sure what value having Velcro at the bottom of the bag provides. I put it in, but probably wouldn’t on future versions. If you do this step, make sure you use the soft half of the Velcro. If you use the rough/stiff half, then you can’t really put any clothing into the bag because it’ll snag.
Enhancement: The next step on the official instruction list is to attach the main panel B to main panel A; and side panel B to side panel A. Don’t do that. It doesn’t make any sense. You’re going to have two “bags” - a short outer bag (from the “B” panels) and a larger inner bag (from the “A” panels). You’re going to need to sandwich the plastic board between those two bag bottoms. Attaching the main panels/side panels like this will just make the sewing way harder. Hard pass.
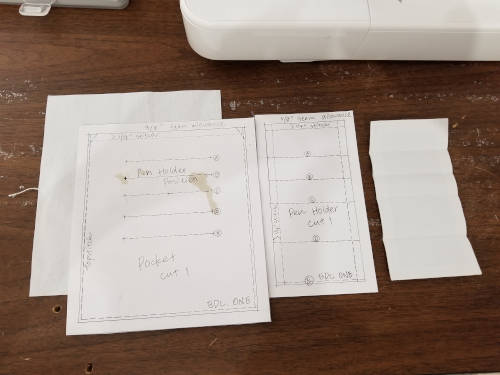
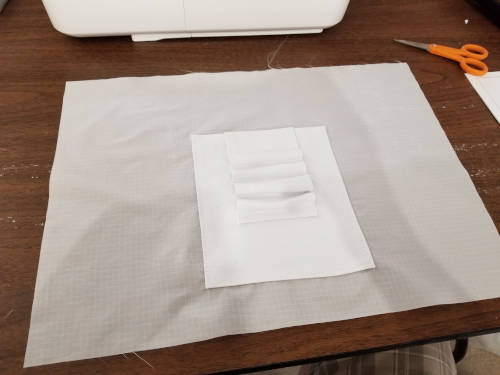
Fold back and finish the edges for the pen holder. You may want to trim the corners so you don’t have weird extra folds showing at the top.
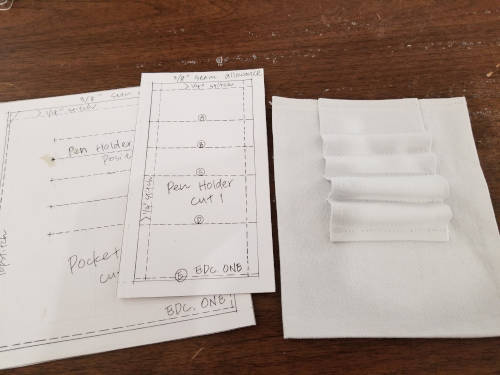
Instead of marking the pen holder pattern on the pen holder, press the pen holder at the locations where you need to sew. This serves two purposes - first, you won’t have to deal with pattern markings; second, the pen holder will bend a little cleaner at the places that get sewn down.
Attach the pen holder to the pocket.
Enhancement: More pockets, more pen holders, pocket closures. The pattern shows a single pocket and pen holder on the inside of the bag. The pocket is open on the top. I have a lot of small things that I cart around with me, so one pocket is not enough. I’d also really like to have a pocket that can close - snap, Velcro, zip, whatever. Before you sew the pocket down to the lining, consider adding more pockets, having better/bigger pockets, etc.
Attach the pocket + pen holder to the lining.
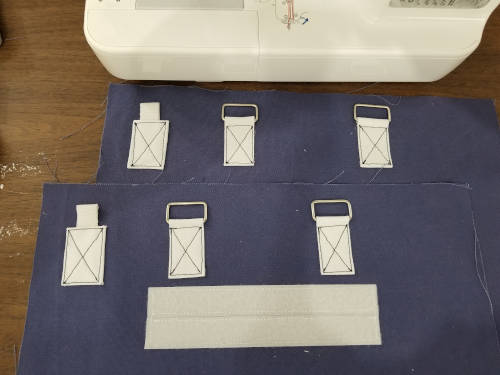
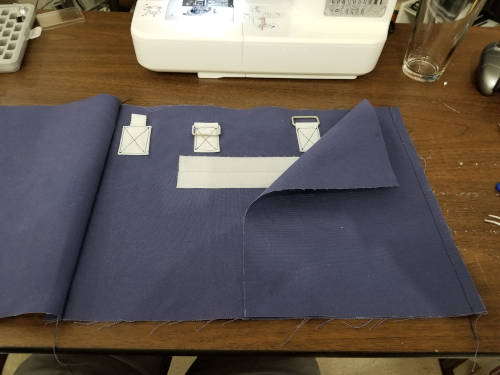
Cut two lengths of Velcro that are 3.5” long. Attach these to one of the main panel A pieces.
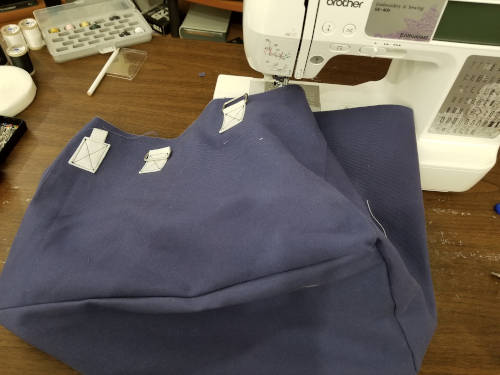
Fold the handle tabs, press, and trim the corners. Attach these with the D rings to the main panel A pieces of the bag.
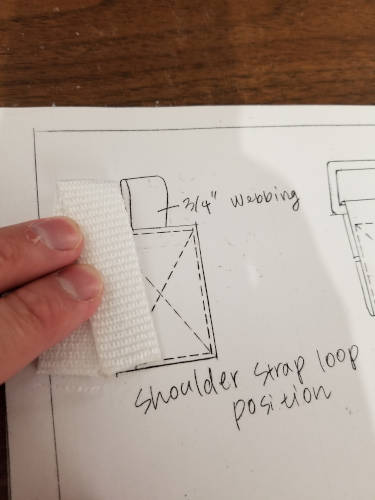
Cut the 3/4” webbing in half so you have two 5” long pieces.
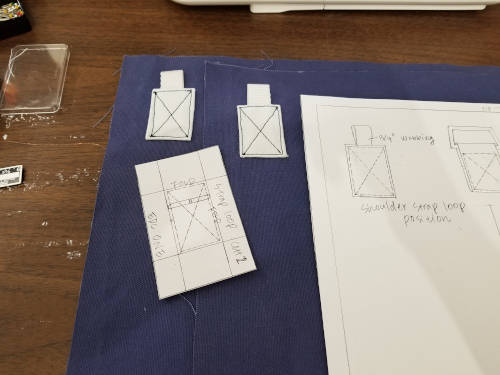
Fold and press the strap loop attachments. Trim the corners as neeeded.
Attach the shoulder strap loops to the main panel A pieces of the bag.
You should have something that looks like this. Note my Velcro is longer because I wanted a longer patch attachment.
Cut the carbon fiber tube into two 4” lengths. Each one of these will be a handle.
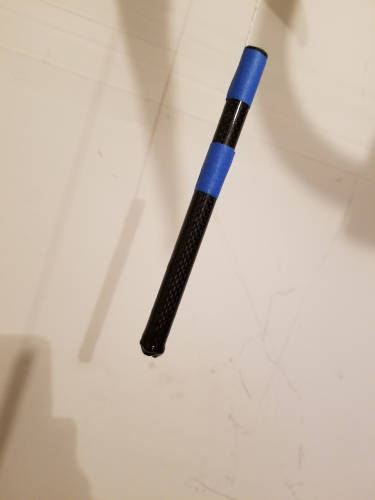
Put the neodymium cylinder magnets into the carbon fiber tubes. Pack each side of the tube so the magnets sit in the center and won’t shake around. However, don’t glue the magnets in because, depending on the orientation, you may need them to be able to rotate in place inside the tube such that the poles will line up when you put the two handles together.
Seal each side of the tube with something waterproof like silicone sealant. Using a waterproof sealant will ensure you can throw the bag in the washing machine if you need to.
I took it a step further and also dipped the handle ends in Plasti-Dip, however if you do that then the carbon fiber tube won’t slide into the handle as easy because the Plasti-Dip is very grippy.
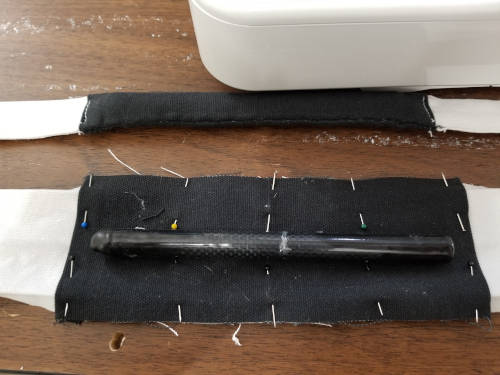
Enhancement: Multi-colored handles. I added a layer of fabric to my handles so they’re multi-colored. The part you hold onto has an extra layer. This also adds some padding around the extra strong magnets.
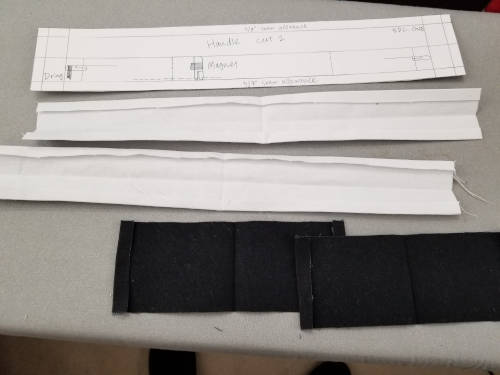
Lay out your handle pieces and press the long seam allowances in. The pattern/instructions call for topstitching to close the handle.
If you’re doing the multi-color handles, sew the top layer down. Make sure when you lay this out, you pin the top layer to the bottom layer while the bottom layer is wrapped around your handle. If you don’t, especially if you’re using thick fabric, the handle won’t lay flat around the carbon fiber tube.
Once you have that set, sew the handle closed. If you didn’t use Plasti-Dip, you should be able to sew the handle and then slide the carbon fiber tube into the middle of it. I did use Plasti-Dip, so I had to sew the handle around the tube. This means I had to slipstitch it closed by hand instead of doing a machine topstitch. I like how it turned out, but it was more effort.
Enhancement: The official instructions say you should attach the handles to the main panel with the D rings now. Don’t do that. It’s going to make it much harder to get the main panels through your machine if you have the handles getting in the way, magnets attaching to the side of the machine, etc.
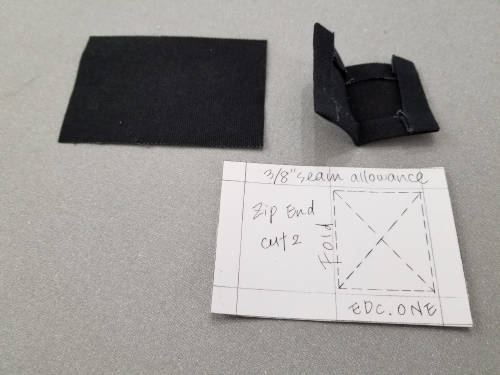
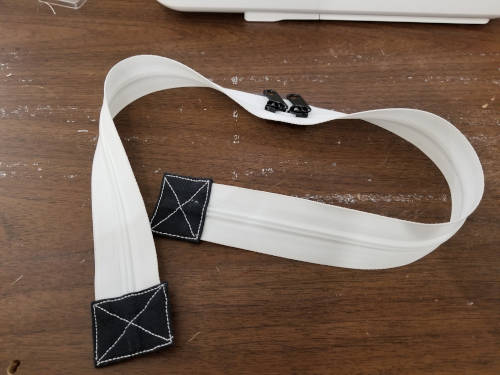
Fold and press the zipper ends. Trim as needed.
Attach the zipper ends to the zipper.
Construction
I’m not sure why the official instructions differentiate between “preparation” and “construction” since you’ve been constructing things all along, but it is what it is.
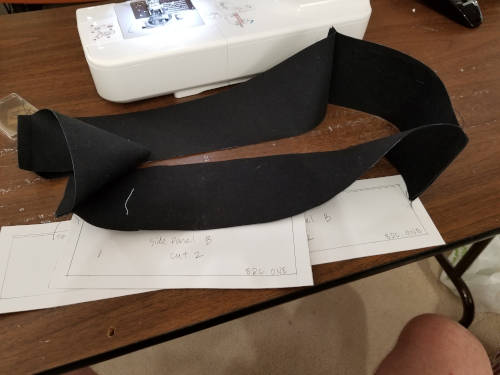
Sew the side panels and the main panels together to form a sort of “tube.” Do this for both the A panels and the B panels.
I attached both sides onto one main panel first, then I attached the final main panel.
Here’s what the bottom (main/side B panels) “tube” looks like.
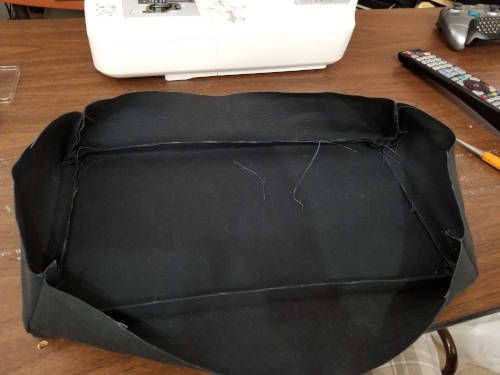
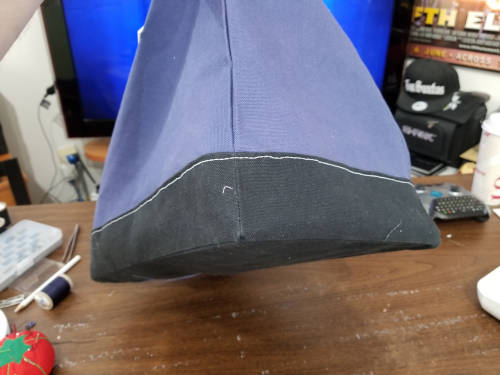
Attach the bottom to each respective tube. You should end up with a short bag (made out of panels B) and a tall bag (made out of panels A). Here’s the bottom attached to my lower/B bag.
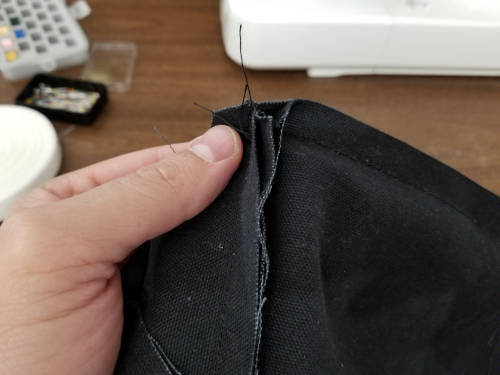
Trim your corners where the bottom attaches to the main bag. There’s a lot of fabric here and it’s going to be lumpy otherwise.
Flip the two bags right-side out. Here’s my main bag “A” flipped right-side out.
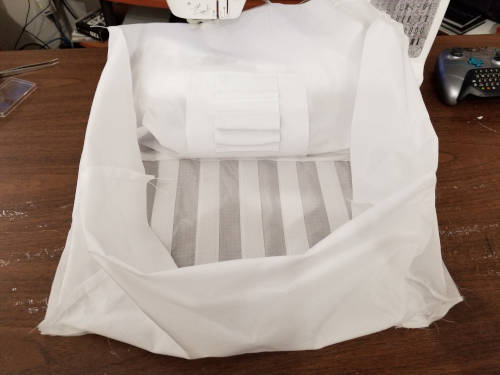
Sew the lining panels together into a tube.
Attach the lining bottom to the lining sides.
Fold the seam allowance on the bottom “B” bag over and press it.
Enhancement: Seal the plastic board. I used a corrugated plastic board that I got in the sign section of Home Depot. If you put the bag in the washing machine, that board is going to fill up and retain water. I used some silicone sealant along the edges of the board to ensure it’s waterproof.
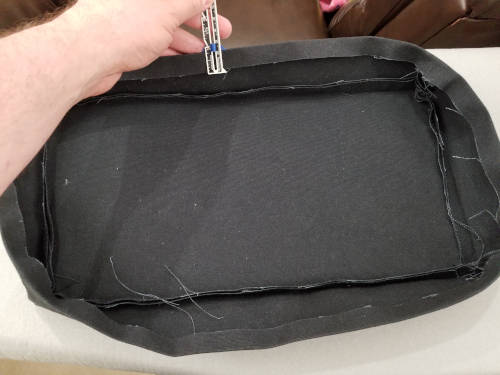
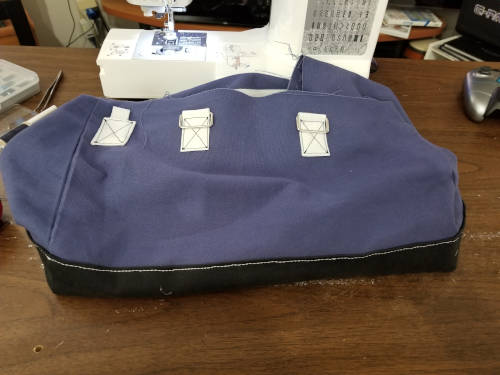
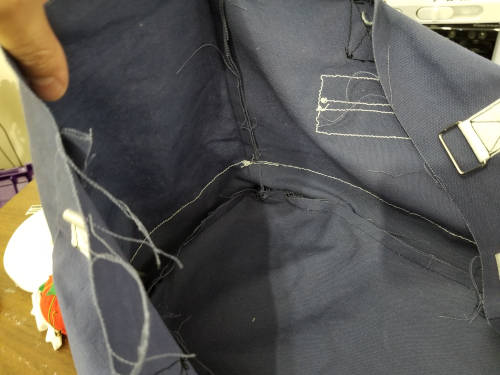
Place the plastic board inside the short bag “B.” Slide the larger bag “A” down inside bag B so the board is sandwiched between the two bags. Topstitch along the top of bag B to attach the two bags.
Enhancement: Use Velcro on one of the short edges and only do topstitching on that side for the visual effect. If you want to put the bag in the washer, sewing it in means the board is stuck there. Next time I make this bag, I’m going to use Velcro to close one of the short sides between bag A and bag B so I can open the Velcro and pull the board out.
From the outside it will look like this:
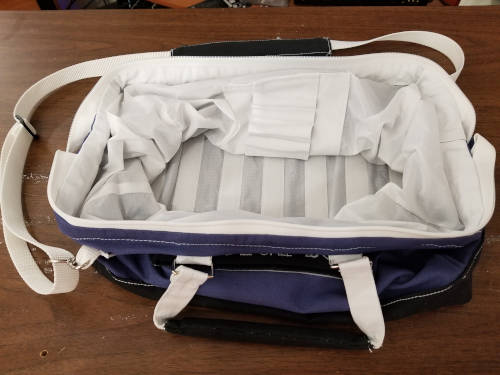
From the inside it will look like this:
Put the lining into the main bag and baste really close to the top edge.
Mark the sides where the zipper should end (ie, where the zipper should stop being attached to the bag). I used pins to do this. Center the zipper on the sides and baste it in place really close to the top of the bag, ending the basting about an inch before your mark.
Press the seam allowances on the channel for the metal frame.
Pin the frame channel to the edge of the bag over the zipper. This part is sort of a geometric mind-bender.
- When the zipper/channel is folded into the bag the channel will end at the top of the bag and you’re going to sew down the bottom of the channel later.
- You want the zipper to stop attaching to the bag at the intersection where the zipper end mark is and where the seam allowance is. This is why you didn’t baste the zipper all the way to the zipper end mark. You’ll see in my picture how the zipper curves down from the edge of the bag to about 3/8” below the edge of the bag when it meets the zipper end mark. This makes a nice smooth transition as the zipper exits the bag.
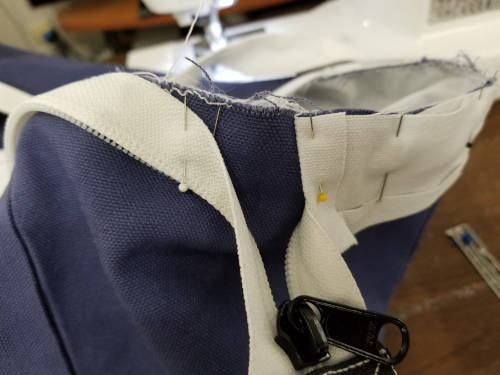
This picture shows where I started the frame channel - right at the bag midpoint. I have it pinned over the top of the zipper, but the zipper makes that gradual transition/curve I mentioned under the channel. I haven’t finished pinning the frame channel down so you can see what the zipper looks like underneath it.
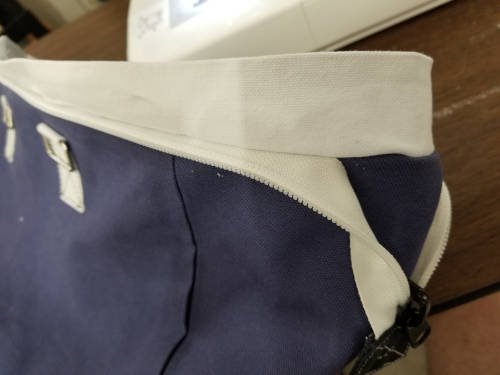
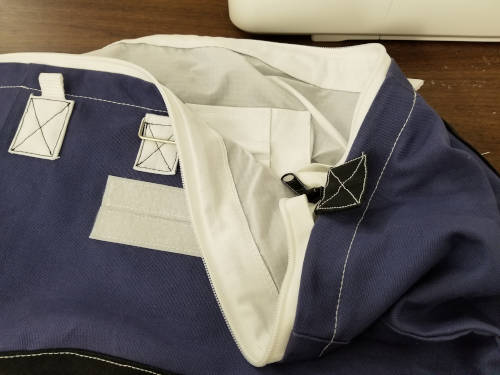
Sew through all thicknesses along the bag seam allowance (3/8” as marked on the pattern) - lining, bag A, zipper, frame channel top. Once it’s all sewn down you can flip the frame channel up and it should look like this from the outside:
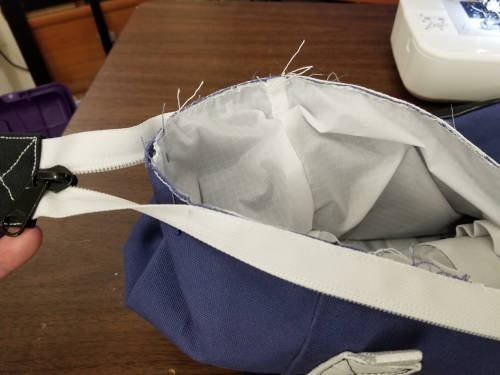
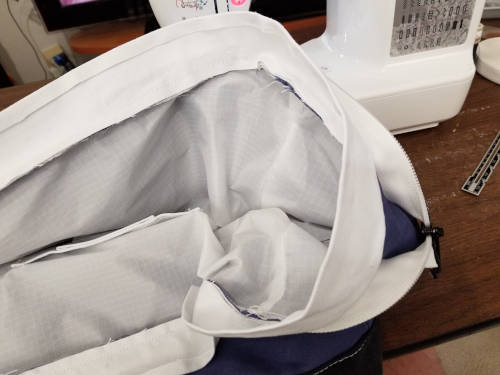
Here’s a view of the same thing from the inside:
Fold the frame channel all the way around to the inside. Pin it down, then sew through all thicknesses - lining, bag A, frame channel bottom. When you’re done, you’ll see the stitching from the outside and it’ll look like this:
Now is a good time to actually attach the handles to the bag. You’re done pushing the bag through the machine so you won’t have the problems of the handles and the tube magnets making life hard.
You’ll note my handles don’t hang totally straight. I used 6” carbon fiber tubes but the D rings on the bag are only 4” apart. I will likely redo my handles at some point to make them better. In my instructions here, I’ve been pretty consistent about the 4” carbon fiber tube lengths to avoid this issue.
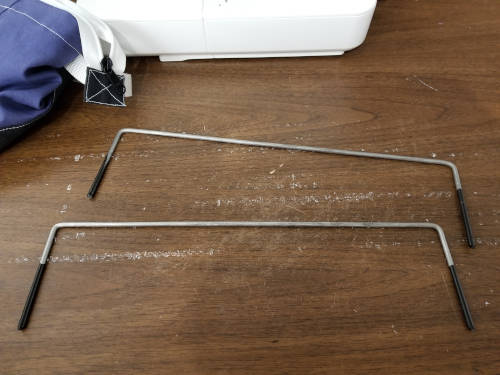
Cut the 3/16” steel rod in half so you have two lengths of 22”. On each end of each length, bend the rod down so you have 3-5/8” “legs”. You should end up with two steel rod pieces roughly in the shape of a really wide “U.” File any sharp edges off the ends so they won’t poke through the bag.
Enhancement: Coat the ends of the frame pieces in Plasti-Dip. This will stop them from sliding around in the frame channel, and it’ll also add more protection from the frame poking through the bag.
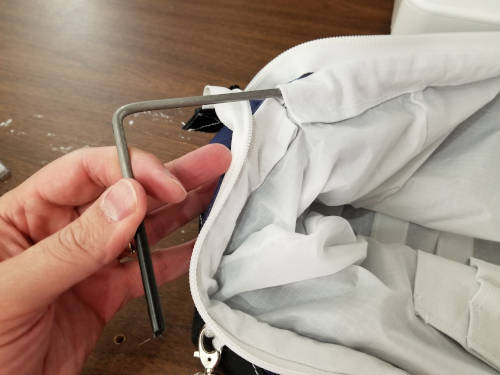
Put the frame pieces into the frame channel along the top of the bag. This gives the bag a sort of “hinged opening” like an old-school doctor’s bag.
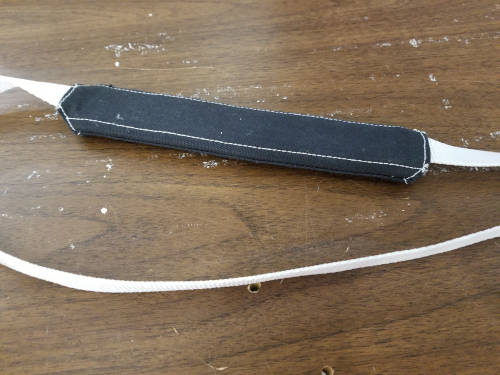
We’re now at a point where the official instructions just stop. There’s no description of what to do with the shoulder pad, and the shoulder pad shown in the reference photos really doesn’t have any pad. So… here’s what I did. Note a lot of it was sort of eyeballing it and hoping so I may not have exact measurements here.
My basic idea was to make a shoulder pad that has an actual piece of padding sewn inside and a channel for the shoulder strap to pass through. I didn’t want it attached to the shoulder strap so I could adjust things as needed.
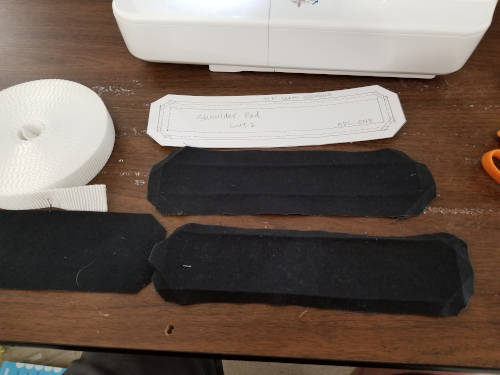
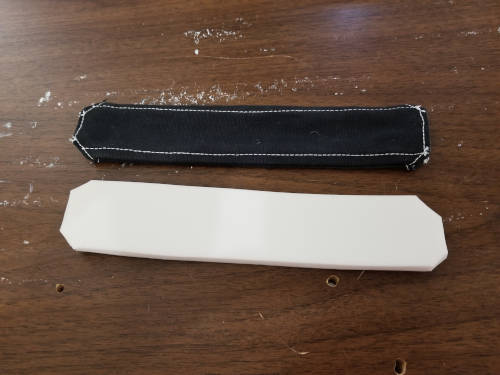
I cut three of the octagonal shoulderpad pieces from the official pattern. I also cut a piece of craft foam a little smaller than the octagon.
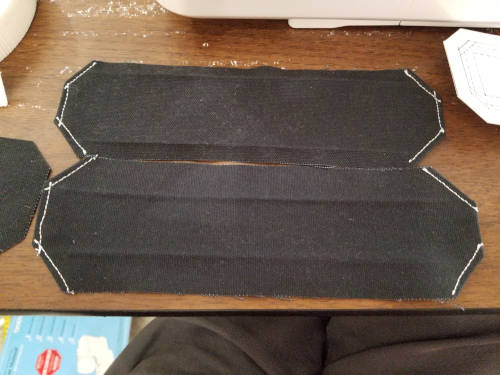
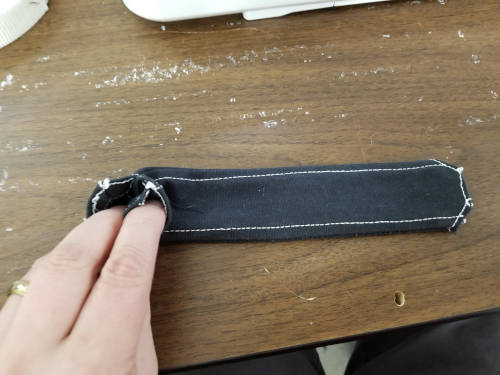
On all of the three pieces I sewed down the ends so they were finished. I also pressed along where the shoulder strap channel would be.
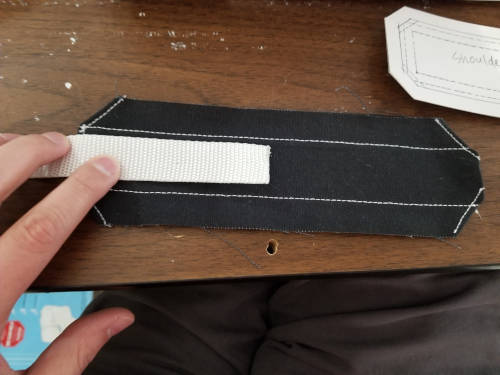
I took two of the finished pieces and sewed them together down the pad channel marking. This makes a sort of tube where I can push the shoulder strap through.
Here it gets a little confusing. Stick with me.
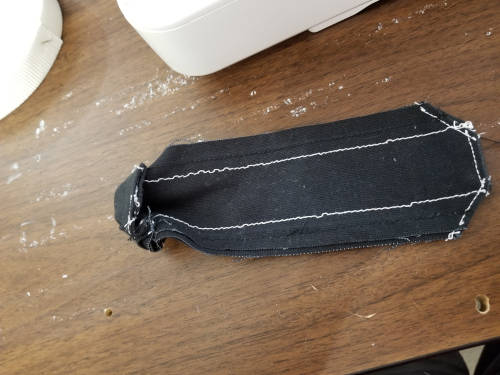
I took the third piece and stuck it on top - right-side to right-side - of the pieces with the channel. I then sewed along the edges with about a 1/4” seam allowance. In the photo below, you can see that sewing along the edge in black. You can see in the photo where I started to flip the whole thing right-side out.
Flip it right-side out and the larger pocket you’ll have is where you’re going to put the foam.
Cut a piece of craft foam and slide it into the shoulder pad. It took me a few tries to get the right size and shape so it’d fill out the shoulder pad but will also sit nice and flat.
Slipstitch the ends of the shoulder pad closed so the foam doesn’t slip out. Be careful not to sew the channel shut where you need to put the strap!
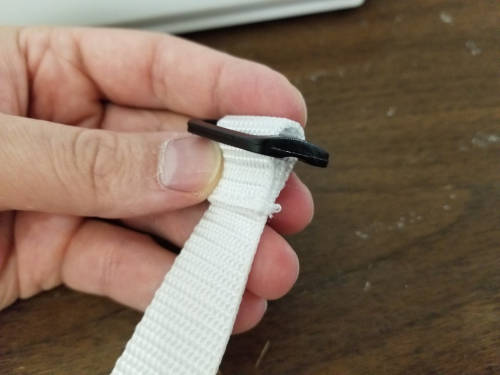
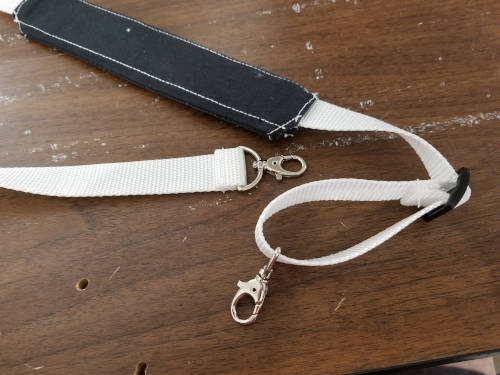
Attach the slide on the end of the shoulder strap and sew it down.
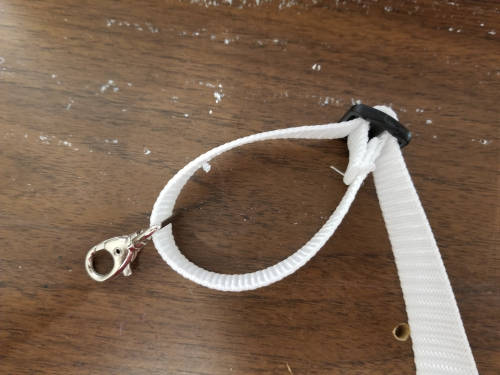
Put one of the lobster claws on the shoulder strap and thread it back through the slide.
Thread the shoulder strap through your custom shoulder pad.
Attach the other lobster claw on the other end of the strap.
There’s also no description of how to make a patch. Ostensibly many people will buy one, but the 2” x 3.5” size doesn’t seem standard to me.
I wanted to make a custom patch, so here’s how I did that.
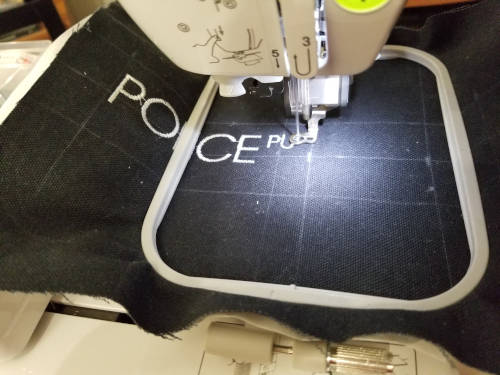
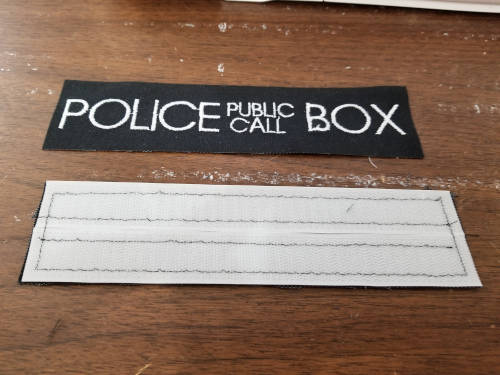
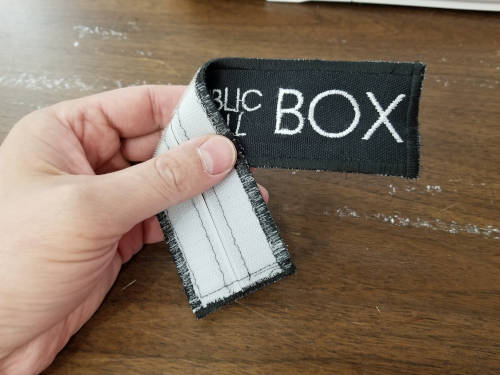
I made my bag Velcro 2” x 8” to accommodate for the larger patch I had planned. I used my embroidery machine to create the design for the patch.
The design/front half of the patch is 2” x 8” and I created a back half that has the Velcro on it.
I attached the two halves and finished the edge of the patch with a very dense zig-zag machine stitch.
The Finished Product
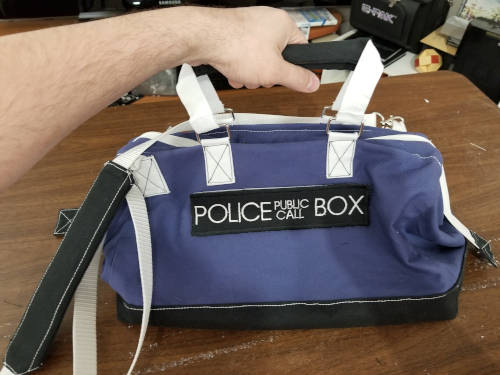
After attaching the shoulder strap and patch, here’s what my bag looks like:
I’m pretty happy with how this turned out. Hopefully this tutorial helped you in making a bag you’re happy with, too!
