
Charlie and the Chocolate Factory
 On
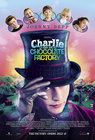
Friday I went to see the latest version of Roald Dahl’s Charlie and
the Chocolate Factory as seen on
the big screen. Huge screen, in fact, as I saw it in an IMAX
theater.
On
Friday I went to see the latest version of Roald Dahl’s Charlie and
the Chocolate Factory as seen on
the big screen. Huge screen, in fact, as I saw it in an IMAX
theater.
I didn’t go in expecting much. The original movie holds a special place in my heart with its songs and Gene Wilder’s couldn’t-care-less Willy Wonka.
I came out very pleasantly surprised.
Tim Burton took the film in a more true-to-the-book direction (at least, so I’ve heard; it’s been years since I read the book and don’t remember too well), and did a great job at it. Plus, with the usual Tim Burton surreal thing going on, it all came together to be pretty darn entertaining.
Johnny Depp did a great job as a pretty freaky Wonka with some pretty obvious family issues. I was worried about how he’d be able to pull off the character, but he did a fantastic job and made it his own, without a hint of the Gene Wilder influence. (That’s actually what I was more afraid of - that it’d be a bad imitation of an excellent Gene Wilder performance.)
The story was slightly updated, too, to account for more recent times. Mike Teavee, for example, was a video game addict rather than just a TV addict. Of course, once Wonka’s factory was entered, all that went out the window anyway.
Which actually brings us to Wonka’s factory - excellent job on the rendition of that. In some cases, particularly the first room they enter where the chocolate waterfall is, it was just like the original movie, but in others, like the invention room, it was entirely new. A pretty good vision for what such a place should look like. And the Great Glass Elevator? Way better than the original movie.
The Oompa Loompas were done very differently from the original movie, and each style has its merits. I’m not sure I was into the outfits the new Loompas had on - the original movie had funnier costumes that I liked. The new Loompas were more playful, though, and I think some of that was missing from the original movie. Plus the songs were more authentic in this latest version, which was cool. (No “Oompa Loompa Doompity Do” in this one.)
I think the IMAX theater added to the surreal nature of the film. The camera angles and sets, which were already pretty crazy, were just made more crazy by the larger-than-life size of the screen combined with the curvature of the IMAX dome. (That’s the only downside to seeing a regular movie in IMAX - the screen curves, which takes some getting used to and sort of makes you a little motion sick at times. Plus it’s so big it’s hard to figure out what to focus on at any given time. Movies that are originally filmed in IMAX don’t have this problem because the filming accounts for the curvature.)
All in all, I liked it, and recommend seeing it. Maybe at matinee prices, or rental - it wasn’t $10-a-seat-in-a-regular-theater worthy, but if you get a chance to check it out on IMAX, do it. Pretty cool stuff.