NDepend 6 Released
NDepend 6 was recently released with a ton of new features. I’ve been working with NDepend for quite some time (my earliest blog entry on it was for version 2.7) and every release gets better. It’s been a couple of years since version 5 came out. What’s new?
The first thing you notice that’s new when you start things up is the additional integrations they’ve added. It used to be just “install the extension for Visual Studio” but now there are icons for TFS, TeamCity, SonarQube, and Reflector integration.
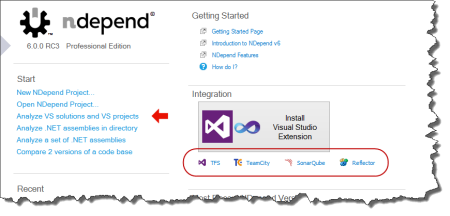
I’m particularly interested in the TeamCity integration because that’s the build server I use. I have manually integrated it in the past using MSBuild and some manual TeamCity configuration, but with the new add-in, I can just drop NDepend on the build server and have all that work done for me. There’s even a specific NDepend build step type added and the report magically shows up in the dashboard. There are some great step-by-step walkthrough videos on the NDepend site showing how to set this up.
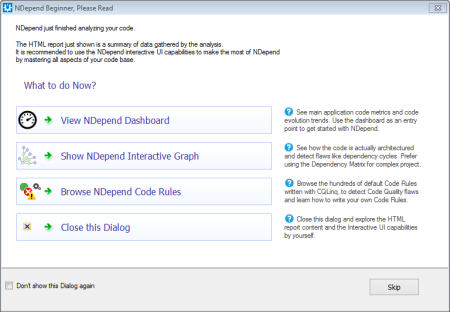
I decided to analyze some of the new code I’ve been working on. It was pretty easy to get my project started. I love how NDepend helps you figure out where to go next if you haven’t used it before.
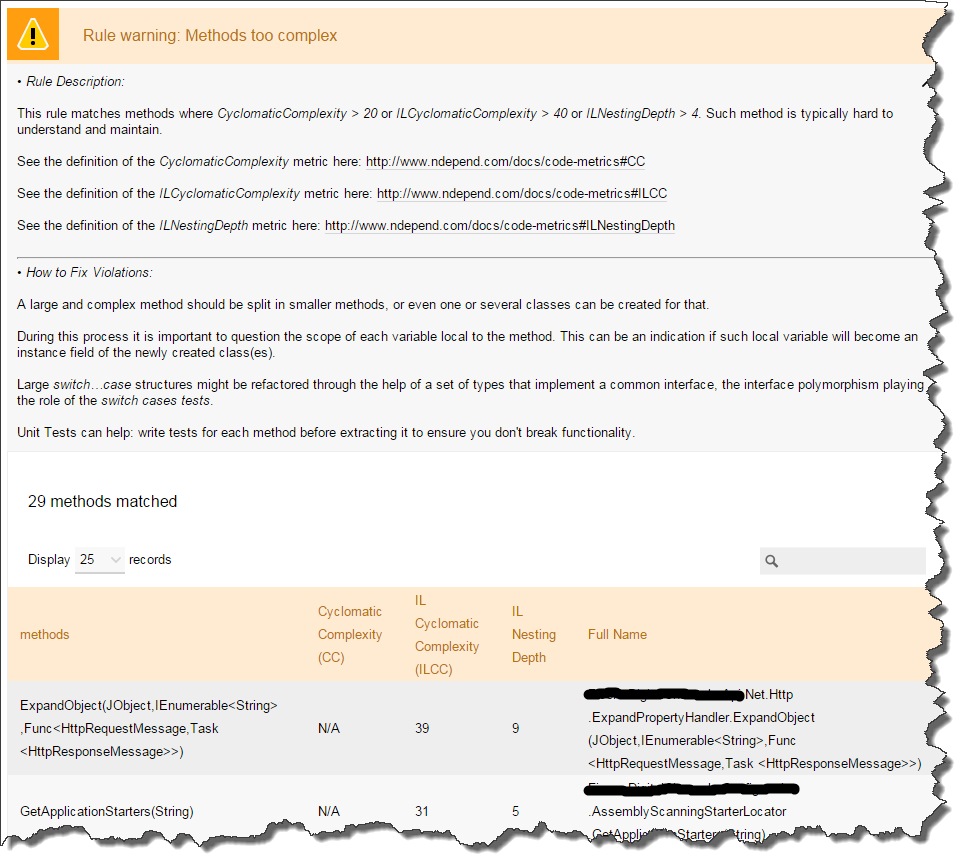
The report has improved by adding “how to fix” information to rule failures. One of the challenges I’ve had in the past is that you could see what things might have failed a rule, but you didn’t really have anything clearly “actionable” you could tell folks to fix. You had to kind of “know” what a rule meant. Now there’s no guesswork.
One of my huge complaints with other tools (coverage, analysis) has been addressed - handling of async/await methods. A lot of what I’ve been working on lately has been Web API code, which is async/await from the ground up. Have you ever looked at that stuff in a decompiler like Reflector? Or a code coverage tool? I’ve found you don’t get any information on it (“Let’s just omit it!”); you get incorrect information on it (“You don’t have full coverage because you didn’t cover all the cases in the generated state machine!”); or you get confusing information (“I’ll show you all of the compiler generated methods that don’t make sense!”).
Reports are very clean and complete, but you don’t see the compiler generated state machine junk. Finally!
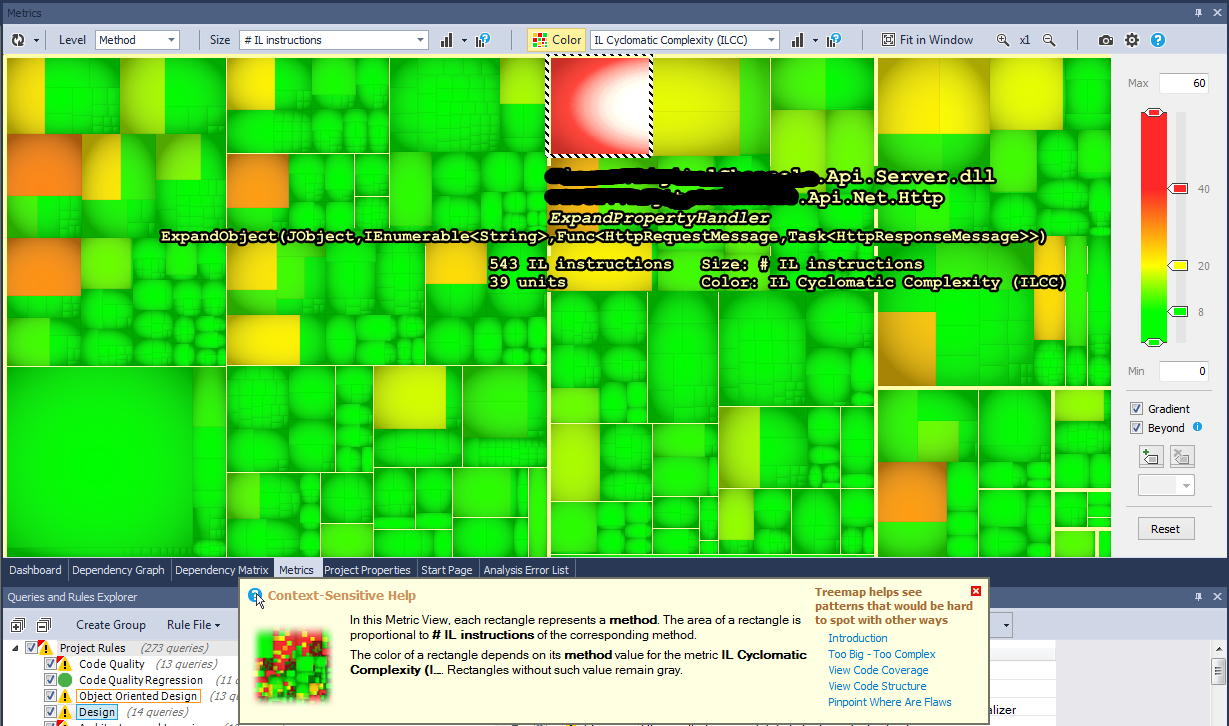
The metrics view just doubled in value by adding a second “dimension” to its display. You used to be able to just change the size of an item in the view based on a specific metric; now you can compare one metric to a second metric by adding a sort of “heat map” style coloration to it.
My favorite combination so far is to set the box size by “# IL Instructions” and set the color of the boxes by “IL Cyclomatic Complexity.” It gives you a pretty good indication of things that need to be refactored - just look for the huge red boxes!
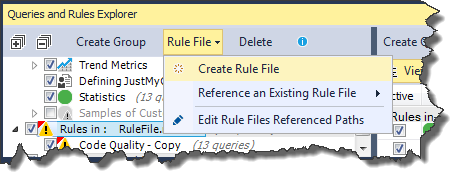
My favorite new feature is the shareable rule files. We have a standard FxCop ruleset we use on all of our projects. We have a standard StyleCop ruleset we use on all of our projects. We can finally have a standard NDepend ruleset we use on all of our projects.
You can create a rule file with all of your analysis rules stored outside the project file and then tell projects to reference the central/common NDepend rules file.
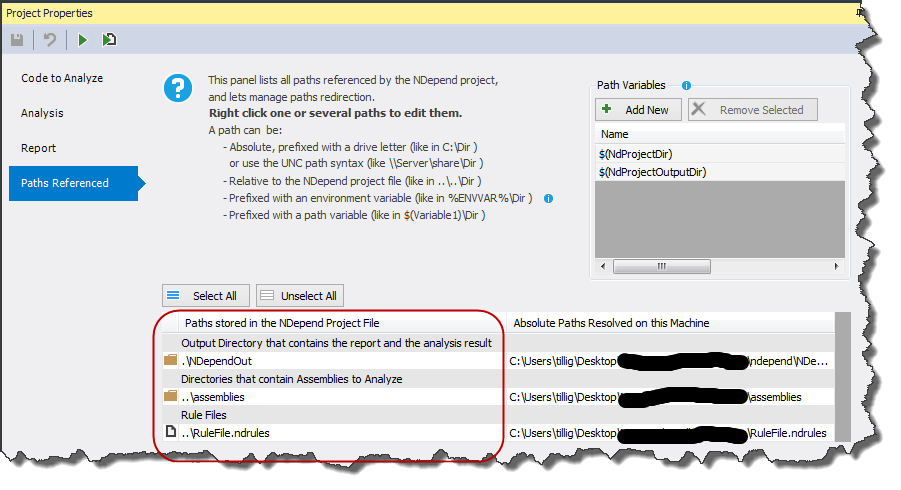
Once you have a custom rules file, you can reference it from your project. You will probably want to switch the paths in your project to be relative to the project file so it works on your machine and the build server.
With every iteration, NDepend just gets more compelling. I get so much insight from it about our code and areas we need to improve - things that are hard to see when you’re neck deep in code and NuGet package references and under a deadline. You owe it to yourself to check it out.
Full disclosure: I got a free personal license from Patrick at NDepend. However, we have also purchased several licenses at work and make use of it to great benefit.