windows comments edit

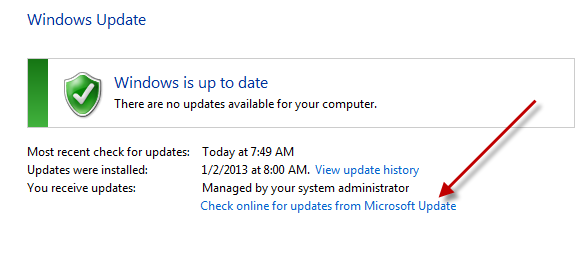
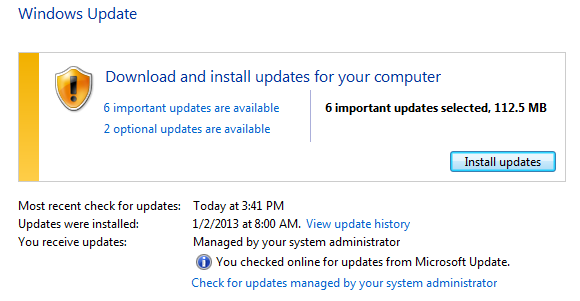
I swear every time I change the Java settings to stop auto-updating it still pops up that stupid “A Java Update is Available” toast in the corner and I want to punch it repeatedly. Killing the scheduled task from startup works until you actually do install the next update, at which point you forget it and it puts itself back.

I run as a non-admin user. The Java auto-update thing hates that. It tells me there’s an update, then I say, “OK, do it then.” It asks me for admin credentials, I enter them, and I instantly get a failure message. Again, I want to punch it repeatedly.

The only way I can get this thing to go away is to manually run the update (or download the entire package and manually install the update). For my own reference, here’s how I do it:

  1. Log in as the administrative user.
  2. Run “C:\Program Files (x86)\Common Files\Java\Java Update\jucheck.exe” with elevated privileges.
  3. Follow the prompts to get the update and make sure to uncheck all the freeware crap they want to install alongside it.

dotnet, gists, build, teamcity comments edit

We use TeamCity as our build server and one of the cool things TeamCity has built in is the ability to serve as a NuGet server. You build your product, run a nuget packtask on it, and TeamCity will automatically add it to the feed.

One of the somewhat odd things I’ve found with TeamCity’s NuGet server is that it seems to require that you let TeamCity run the actual nuget packon packages it should host. That is, even if you wanted to do that action in your build script, you can’t – simply putting the package into your set of build artifacts doesn’t get it into the feed. You actually have to use the “NuGet Pack” build step in your build. When you do that, the build step ignores any version information you put inside your .nuspec files because the “NuGet Pack” build step requires you to specify the version right there.

That’s fine as long as the build number for the build (or some similar existing variable) is also the version you want on your NuGet package. But when you want to have tighter control over it, like calculating the version as part of a build task, it becomes less clear how to get things working. This should help you.

First, you have to establish a NuGet package configuration variable. You need this so you can use it in the NuGet Pack build steps. In your TeamCity build configuration, go to the “Build Parameters” tab and define a “System Property” with your calculated NuGet package semantic version. I called mine “CalculatedSemanticVersion” so it ends up showing in the TeamCity UI as “system.CalculatedSemanticVersion” like this:

system.CalculatedSemanticVersion = 0.0.0 Set it to some simple, default value. It won’t stay that value so it doesn’t matter; it’s more for when you come back later and look at your configuration – this way it’ll make a little more sense.

Next, set up your NuGet Pack build steps. Use this new “system.CalculatedSemanticVersion” property as the NuGet package version you’re building.

On the NuGet Pack step use the new version variable.

Finally, insert a build script step before all of your NuGet Pack steps. In that build script step, calculate the version you really want for your packages and use a TeamCity message to update the variable value. You do that by using a specially formatted message written to the console, like this:

##teamcity[setParameter name='system.CalculatedSemanticVersion' value='1.0.0-beta1']

In MSBuild, you might have something that looks like this:

<?xml version="1.0" encoding="utf-8"?>
<Project
  DefaultTargets="SetVersion"
  xmlns="http://schemas.microsoft.com/developer/msbuild/2003"
  ToolsVersion="4.0">
  <Target Name="SetVersion">
    <!--
      Calculate your semantic version however you like.
      This example uses a made-up build task, but you
      could do anything.
    -->
    <CalculateMySemanticVersion>
      <Output TaskParameter="Version" PropertyName="SemanticVersion" />
    </CalculateMySemanticVersion>
    <!-- The message task here is the important part. -->
    <Message Text="##teamcity[setParameter name='system.CalculatedSemanticVersion' value='$(SemanticVersion)']" />
  </Target>
</Project>

Now when your build configuration runs, the script will calculate your NuGet package version and update the value of the property before the NuGet Pack tasks run. The NuGet Pack tasks will build your packages using the correct calculated version that you controlled through script.

dotnet, gists, build, xml comments edit

Although I wasn’t a big fan of NuGet when it started getting big, I have to admit it’s grown on me. I think part of that has to do with the large amount of improvement we’ve seen since back then. Regardless, I’m in a position with Autofac and other projects where I’m not only consuming NuGet packages, I’m also producing them.

One of the biggest pains I have when maintaining the .nuspec files for my packages is that you can update a dependency for your project (via NuGet) but the corresponding version value isn’t updated in the .nuspec. (This is, of course, assuming you’re doing manual maintenance and not re-generating everything each time. In a single-package solution, I can see regenerating would be fine, but when you’ve got multiple like in Autofac, you don’t want to regenerate.)

What I want is for the .nuspec file <dependency> entries to match the installed package versions that I’m actually building against.

So… I automated that with MSBuild. Here’s how:

First, put placeholders into your .nuspec file(s) using a special format, like this:

<dependencies>
  <dependency id="Autofac" version="$version_Autofac$" />
  <dependency id="Castle.Core" version="$version_Castle.Core$" />
</dependencies>

Each dependency gets a $version_NuGetPackageName$ format placeholder. The “NuGetPackageName” part matches the name of the dependency (and, coincidentally, the first part of the folder name under “packages” where the dependency gets installed in your solution).

Next, in your build script, include a custom task that looks like this. It will look in the “packages” folder and parse the various folder names into these placeholders so you can do some search-and-replace action.

<UsingTask TaskName="GetNuGetDependencyVersions" TaskFactory="CodeTaskFactory" AssemblyFile="$(MSBuildToolsPath)\Microsoft.Build.Tasks.v4.0.dll">
  <ParameterGroup>
    <PackageInstallDirectory Required="true" />
    <Dependencies ParameterType="Microsoft.Build.Framework.ITaskItem[]" Output="true" />
  </ParameterGroup>
  <Task>
    <Using Namespace="System" />
    <Using Namespace="System.Collections.Generic" />
    <Using Namespace="System.IO" />
    <Using Namespace="System.Text.RegularExpressions" />
    <Using Namespace="Microsoft.Build.Framework" />
    <Using Namespace="Microsoft.Build.Utilities" />
    <Code Type="Fragment" Language="cs">
      <![CDATA[
        // Match package folders like Castle.Core.3.0.0.4001
        // Groups[1] = "Castle.Core"
        // Groups[2] = "3.0.0.4001"
        var re = new Regex(@"^(.+?)\.(([0-9]+)[A-Za-z0-9\.\-]*)$");

        try
        {
          // Create item metadata based on the list of packages found
          // in the PackageInstallDirectory. Item identities will be
          // the name of the package ("Castle.Core") and they'll have
          // a "Version" metadata item with the package version.
          var returnItems = new List<ITaskItem>();
          foreach(var directory in Directory.EnumerateDirectories(PackageInstallDirectory))
          {
            var directoryName = Path.GetFileName(directory);
            var match = re.Match(directoryName);
            if(!match.Success)
            {
              continue;
            }
            var name = match.Groups[1].Value;
            var version = match.Groups[2].Value;
            var metadata = new Dictionary<string, string>();
            metadata["Version"] = version;
            var item = new TaskItem(name, metadata);
            returnItems.Add(item);
          }
          Dependencies = returnItems.ToArray();
          return true;
        }
        catch(Exception ex)
        {
          Log.LogErrorFromException(ex);
          return false;
        }
      ]]>
    </Code>
  </Task>
</UsingTask>

If you’re industrious, you could package that build task into an assembly so it’s not inline in your script, but… I didn’t. Plus this lets you see the source.

Now you can use that build task along with the MSBuild Community Tasks “FileUpdate” task to do some smart search and replace. Here are a couple of MSBuild snippets showing how:

<!-- At the top/project level... -->
<!-- You need MSBuild Community Tasks for the FileUpdate task. -->
<Import Project="tasks\MSBuild.Community.Tasks.targets" />
<PropertyGroup>
  <!-- This is where NuGet installed the packages for your solution. -->
  <PackageInstallDirectory>$(MSBuildProjectDirectory)\packages</PackageInstallDirectory>
</PropertyGroup>

<!-- Inside a build target... -->
<ItemGroup>
  <!--
      This should include all of the .nuspec files you want to update. These should
      probably be COPIES in a staging folder rather than the originals so you don't
      modify the actual source code.
  -->
  <NuspecFiles Include="path\to\*.nuspec" />
</ItemGroup>
<!--
    Parse out the installed versions from the list of installed
    packages using the custom task.
-->
<GetNuGetDependencyVersions PackageInstallDirectory="$(PackageInstallDirectory)">
  <Output TaskParameter="Dependencies" ItemName="LocatedDependencies" />
</GetNuGetDependencyVersions>
<!-- Use the MSBuild Community Tasks "FileUpdate" to do the search/replace. -->
<FileUpdate
  Files="@(NuspecFiles)"
  Regex="\$version_%(LocatedDependencies.Identity)\$"
  ReplacementText="%(LocatedDependencies.Version)" />

Generally what you’ll want to do from a process perspective, then, is:

  1. Build and test your project as usual.
  2. Create a temporary folder to stage your NuGet packages. Copy the .nuspec file in along with the built assemblies, etc. in the appropriate folder structure.
  3. Run the file update process outlined above to update the staged .nuspec files.
  4. Run nuget packon the staged packages to build the final output.

This will ensure the final built NuGet packages all have dependencies set to be the same version you’re building and testing against.

media, windows comments edit

Windows Home Server v1 is end of mainstream support tomorrow and some folks have asked me what I’m going to do.

Options for switching include upgrading to WHS 2011, switching to Windows Server 2012 Essentials, or moving off the Windows platform entirely to something else.

If you’ve been following my Media Center solution, you’ll know I have both an HP MediaSmart Windows Home Server v1 and a Synology DS1010+.

I use the WHS for:

  • PC image-based backups
  • General file sharing
  • Image sharing
  • Music sharing (both via file system and via UPnP using Asset).
  • Windows 8 File History

I use the Synology DS1010+ for:

  • Storing DVD movie images
  • Serving the MySQL instance for my XBMC machines

Both machines have all drive bays full. The Synology doesn’t have enough space to hold all the stuff I have on the Home Server and the Home Server can’t hold all the stuff on the Synology. We’re talking about terabytes on both machines. Keeping that in mind, if I were to want to change the OS on the WHS it’d require me to…

  • Move everything off the WHS to… somewhere.
  • Reformat and upgrade the OS on the HP MediaSmart box, which is older and not super-powerful. It’s also headless (no video card and no DVD drive) so… that’s pretty limiting. If there’s any troubleshooting to do during the installation, that’s going to be painful.
  • Hope against hope that the new OS won’t tank the HP box into non-performance and that all the drivers are properly found.
  • If I go with Windows Server 2012 Essentials, I get to set up a domain for my home computers and go around joining everything so they can be backed up. If I go with WHS 2011, I will get the same backup functionality I’m used to. If I go with something else… I get to figure out my backup solution.
  • Move everything back to the WHS that was previously there and set all that junk up again.

If, instead, I moved everything to the Synology I’d need to upgrade all the drives in the RAID array. It’s RAID 5 so I can’t do one at a time. And I can’t switch to a different RAID strategy (like the Hybrid RAID they provide) without moving everything off the NAS and back on.

UGH. There was a time in my life where I had a bunch of time at home and loved to tinker with things. Now… it takes me two nights to watch a two-hour movie. I just want things to work.

So what am I going to do?

Not a damn thing.

I don’t expose my WHS to the outside world so I’m not worried much about the security aspect of things. I will probably run it until it dies. In the meantime I’ll slowly be moving things over to the Synology. I will probably end up investing in the five-drive expansion bay for it so I can add more drives in a new array. Then I can stock those drives up and slowly but surely both expand storage and switch to the Hybrid RAID approach. I’ll also have to figure out my UPnP answer (I’ve admittedly not tried the Music Station that Synology offers, but I hope it does transcoding of, like, Apple Lossless and whatnot). And I’ll have to figure out the backup strategy; probably something like Acronis TrueImage.

In the meantime… the plan is “no action.”

comments edit

I’ve been wanting Windows Live Writer for Surface RT for a while but I noticed Hanselman mentioned you could blog from Word (which I never knew) so I thought I’d try it out.

If you’re reading this… I was successful. Yay!